
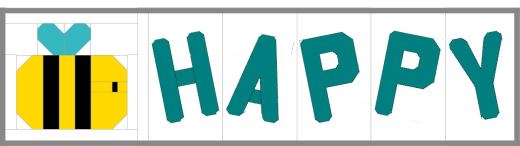
This fun and cheerful mini quilt will for sure brighten up your day when you see it hanging on your wall.
The Bee Happy mini quilt is made with the free Bee block pattern from the Sugaridoo blog, and the Modern ABC pattern. First a list with everything you need:
Patterns
- Happy Bee quilt block [free pattern]
- Modern ABC letters [PDF pattern in the shop]
Fabric
- 5 x 10″ yellow (bee)
- 3 x 10″ black (bee)
- 2 x 4″ blue (bee)
- 4 x 10″ for each letter
- 20 x 20″ Background (bee + letters)
- 4″ x WOF for binding
- 26 x 8″ backing fabric
- 26 x 8″ batting

1. Make the Happy Bee block
First step in making this mini quilt is making the Happy Bee block. This block should measure 6 1/2 x 6 1/2 inch including seam allowance. That is also the height of the whole mini quilt.

2. Make the H A P P Y letters
When you’re done with the bee block, you can start with the letters. Make the letters H A P P Y from the Modern ABC pattern in size 4 x 2 1/2″ (finished size 4 1/2 x 3″). For this you print the letters to 66,6% of the original size

3. Tilt the letters
Now it’s time to tilt the letters. For the you need to cut two pieces of background fabric for each letter measuring 5 x 3 1/2″ and 4 1/2 x 3″. The first letter is leaning to the left.
Place your fabric right side facing up. Cut the two pieces of background fabric like the schematic below. The measurements are including seam allowance.
To lean a letter to the right you need to cut the mirrored image of the schematic below.

Now sew the two pieces you cut from the 4 1/2 x 3″ rectangle with the 4 1/2 inch side to the sides of your letter with a 1/4″ seam allowance.

Then take the two pieces to cut from the 5 x 3 1/2″ rectangle and sew them to the top and bottom of the letter. You’ve now created a new rectangle. Don’t worry if the sides don’t completely match up. We will now trim the sides.
For the Bee Happy mini quilt we will cut the tilted letters to 4 x 6 1/2 inch, including seam allowance.

Different letter projects
You can of course also use this method to tilt your letters for a different project. In the illustration you see that the biggest block that you can make like this measures 4 3/4 x 7″. Cut your block at least 3 3/4 x 5″ to have enough room around the letter for a 1/4″ seam allowance.
Just play around with the size of the rectangles that you started with to make the block bigger or put the letters under a bigger or smaller angle.
4. Assembling the quilt
Yay! Everything is now ready to assemble the mini quilt. Start with your Happy Bee block on the left. Sew a strip of 1 x 6 1/2″ background fabric to the right side of the bee. Then dd the H, and all the other letters.
Aaand then your top is done! Whoohoo. That already looks great doesn’t it? Now it’s time for some tea and to get your quilt top ready to be quilted.

5. Quilt your mini
Your completed mini quilt top now measures 24 1/4 x 6 1/2 inch including seam allowance. Only thing left to do is quilting your mini quilt and adding a binding.
I use a piece of batting and background fabric of about 26 x 8 inch to make a quilt sandwich. Just make sure that they are a little bit bigger than your quilt top.
In this YouTube video you can see how I quilted the Bee Happy mini quilt and the Bee Kind mini quilt. Two different methods, both will look great on your mini.
6. Binding
For this quilt I picked one of the fabrics used in the letters for my binding. A bright green by Sassafras Lane.
I cut two strips of 2 inch wide (or 5 cm) of the width of my fabric for this mini quilt.
Attach them with your preferred method of binding to your quilt. Here is a video of how I like to do my binding:
7. Done!
And you’re done. Awesome! Don’t forget to post your mini on Instagram and tag @sugaridoo or use #BeeHappyMiniQuilt so I can see what you made.
Hope this quilt will put a big smile on your face every time you look at it.
Big hug!
Irene


 No products in the cart.
Hello Irene,
Will the Bee Happy quilt kit be back in stock soon? I hoped to buy it and was disappointed to see it is of stock.
Yours hopefully
Pam
Just made the Bee and Happy part and now to add wadding etc. Would have uploaded a photo but can’t see any links for that. Also used bright colours and really like it.